A botched installation can ruin even the highest quality countertop. Today let’s take a look at how to install an undermount kitchen sink with a focus on properly supporting the weight of the sink. Small bathroom or bar sinks are easier – they typically can be mounted directly to the concrete using the hardware provided with the sink. Kitchen sinks are too heavy to mount directly to the concrete, so special preparations must be made.
Order of Installation
It’s very important to install an undermount kitchen sink before the countertop slabs are set down. Once the countertop slabs are set down, you usually will not be able to fit the sink through the hole, and you won’t be able to properly seal between the sink and the underside of the countertop.
- First install the sink supports. We’ll talk about 3 different ways to install sink supports below.
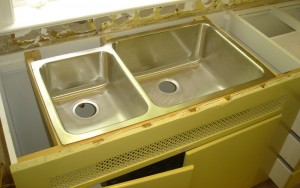
- Then set the sink onto the support frame.
- Apply a generous bead of caulk around the top of the sink’s flange. Use silicone or siliconized acrylic kitchen and bath caulk.
- Install the adjacent countertop slabs over the sink, sandwiching it between the countertop and the cabinet frame.
Types of Sink Supports
For concrete countertops, the concrete should not bear the weight of the sink. Instead, you build a support out of plywood, and the cabinet frame together with the support bear the weight of the sink.
Commercial Bracket
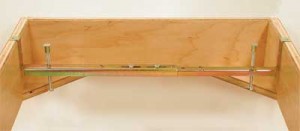
The first type of support is a commercial sink bracket sold by granite supply companies. These brackets are designed to be installed onto the cabinet frame. Follow the manufacturer’s instructions.
Custom Wood Frame
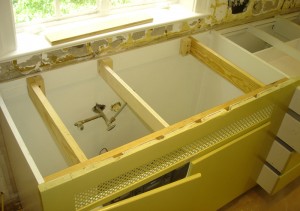
The second type of support is a custom made wood frame that mounts to the cabinet walls. The frame supports the sink by its flanges. Always leave some wiggle room between the sink bowl and the cradle so that you can align the sink with the countertop hole.

Custom Plywood Shelf
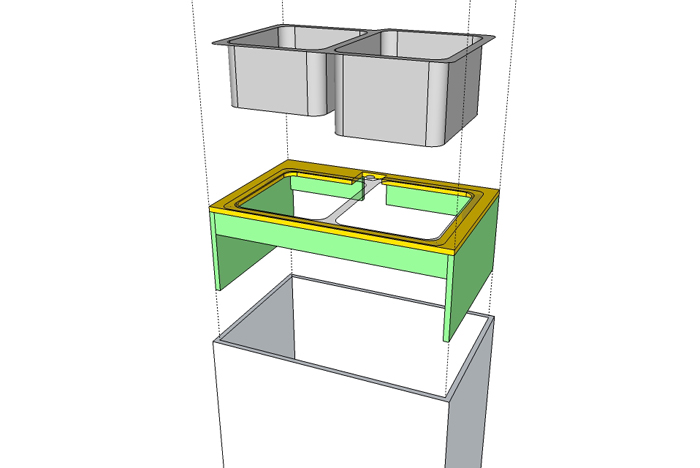
The third type of support is a sheet of ¾” plywood shelf (yellow, below) that’s cut to fit inside the cabinet. The plywood has a hole cut into it that the undermount sink drops into. The hole in the plywood must be large enough to allow for the sink to be moved to align it with the hole in the countertop. Sometimes it’s useful to rout a roundover along the inside edge of the hole. In addition, it’s important to cut holes for all the plumbing and faucet fixtures that mount to the countertop. The hole in the plywood must be large enough to allow for tools to access the faucet and plumbing hardware.
Caulking
It is very important to create a watertight seal between the underside of the countertop and the sink. Take care when applying the silicone caulk along the flange of the sink that it is generous enough to create a watertight seal, but not so much that it is messy.
Bare concrete will react with silicone to produce a nasty-looking, oatmeal-like consistency that will ooze out of the sink joint. Therefore, you must seal the underside of your sink openings so that only sealed concrete touches the silicone.
More Information
For a complete step by step guide for how to install concrete countertops, click here.
