Knowledge
Confidence
Success
KNOWLEDGE Learn Not Just How, But Why
Since 2004, CCI has been the largest and most trusted resource for learning about concrete countertops, mix design, sealers and more. Explore our knowledge base and get a full understanding of how to master concrete countertops, sinks, furniture, mold making, sealing and more.
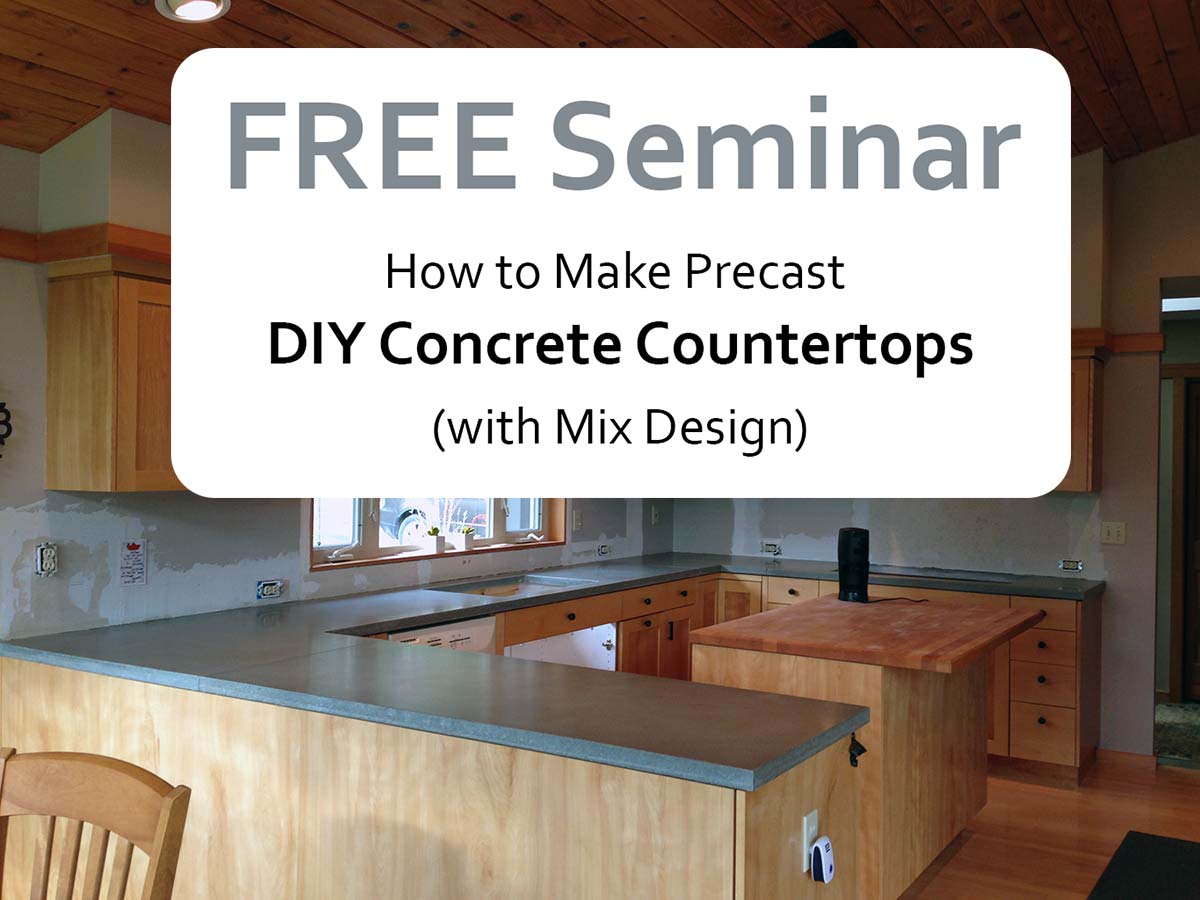
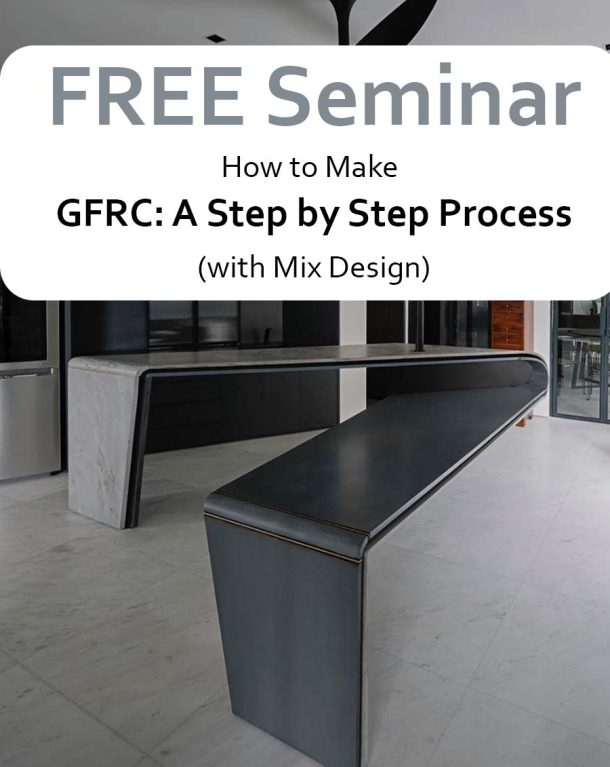
FREE Seminar: How to Make GFRC: A Step by Step Process (with Mix Design)
Why You Should Be Using GFRC For Your Concrete Projects
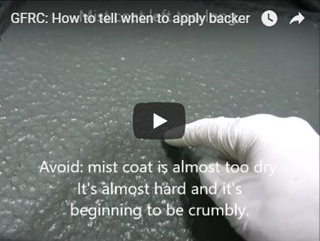
How to Know When Your GFRC Mist Coat is Ready for Backer
CONFIDENCE Concrete Countertop Products You Can Trust
CCI offers the most advanced, effective products for concrete countertop mixes and sealers. You can be confident that our products do what they say they do, based on sound engineering and in-depth testing. You can understand exactly how they work, why you should use them, and when.

SUCCESS Training With Proven Success
Thousands of people from all over the world have completed CCI training. Their success proves that CCI training WORKS. It is the only program that gives you a solid technical foundation based on proven scientific principles, freeing you to be more creative without worries.

Dylan Myers Design, Maryland

Original Concrete Design in Schenectady, NY
Mohawk Valley Concrete Countertops, New York
Frequently Asked Questions About Concrete Countertops
If you are a homeowner considering concrete countertops for your kitchen or bathroom, here is some basic information about the most frequent questions and misconceptions about concrete.
High quality concrete will give you a beautiful, smooth and durable surface that you will love, and that is easy to clean and care for.
Are concrete countertops less expensive than granite?
If you are looking to purchase professionally made concrete countertops: No, absolutely not! If they are, you should be wary of having a sidewalk on top of your cabinets.
High quality concrete countertops are hand crafted by skilled artisans using ultra high performance concrete mixes and sealers. They are hand made, custom, unique and personalized – and worth the money.
How much does it cost to make concrete countertops?
DIY Concrete Countertops
A few hundred dollars. Click here.
Pro Concrete Countertops
If you are a professional looking to make concrete countertops as a business, material costs of concrete countertop mixes are not the issue. Concrete is mainly sand, cement and water, with some admixtures and fibers added in.
The important thing for pros is knowledge about and skill in concrete, plus all of the other processes: templating, forming, reinforcing, diamond polishing, sealing, installation. Labor is by far a bigger cost in creating concrete countertops than materials are.
Even more important is business management. For creative concrete professionals, The Concrete Countertop Institute provides extensive business training and resources, in addition to technical training on concrete and hands-on learning, in The Ultimate Creative Concrete Training.
Are concrete countertops durable?
Yes, when properly made. “Durable” could refer to structural integrity, or to appearance. High quality concrete countertops should have both types of durability.
You may have heard the maxim, “Concrete cracks”. You’ve seen huge cracks in sidewalks. This does not have to be the case with concrete countertops. Tiny hairline cracks are possible, but structural cracks should never occur in properly made concrete countertops.
The durability of the appearance of your concrete countertops depends entirely on how they are sealed. Bare concrete is porous and highly susceptible to staining. Acids literally eat away the cement paste between the sand grains in bare concrete.
But if a high performance coating sealer such as Omega or Ovation is applied, acids and staining agents will never touch the concrete. Your concrete will still look very natural, and it will not require maintenance.
How often do you have to paint your car?
How often do I need to reseal my concrete countertops? How do I maintain them?
The answer to this question depends entirely on the sealer used.
Cheap acrylic sealer will need maintenance every few months, maintenance of penetrating treatments will vary, whereas a high performance coating such as Omega or Ovation will never need to reapplied unless abused.
All sealed concrete surfaces should be cleaned with a non-abrasive cleaner. Coating sealers should never be cut on. Unless your coating is made of diamonds, it will scratch!
How thick should a concrete countertop be?
There is no need for precast concrete countertops to be thicker (and heavier!) than typical countertops such as granite and solid surface.
With high performance concrete countertop mixes and proper reinforcing, GFRC concrete countertops are made 3/4″ (19 mm) thick, and the edges are turned down to achieve the desired appearance of thickness.
Traditional steel-reinforced precast concrete countertops can be made 1.5″ (38 mm) thick.
How heavy are concrete countertops? Do I need to reinforce my cabinets?
Concrete is about the same weight of stone of the same thickness. 1.5″ thick precast concrete countertops weigh about 18 pounds per square foot, whereas granite countertops typically weigh about 19 pounds per square foot.
You don’t think twice about putting granite on cabinets without extra reinforcement, so why would you need it with concrete?
GFRC concrete countertops are generally made only 3/4″ thick, half the thickness of traditional countertops, so they weigh about half as much.